Before we starting the article we will first learn what is Material Design ??
Material Design is an Android-oriented design language created by Google, supporting onscreen touch experiences via cue-rich features and natural motions that mimic real-world objects. Designers optimize users' experience with 3D effects, realistic lighting and animation features in immersive, platform-consistent GUIs.
Material Design in XAML is a theme library that brings Google's Material Design to your Windows Presentation Framework (WPF) applications. It enhance the user experience and looks catchy.
So Let's Create an application in WPF and see how to implement material Design into it.
Step-1 File-> New Project
Step-2
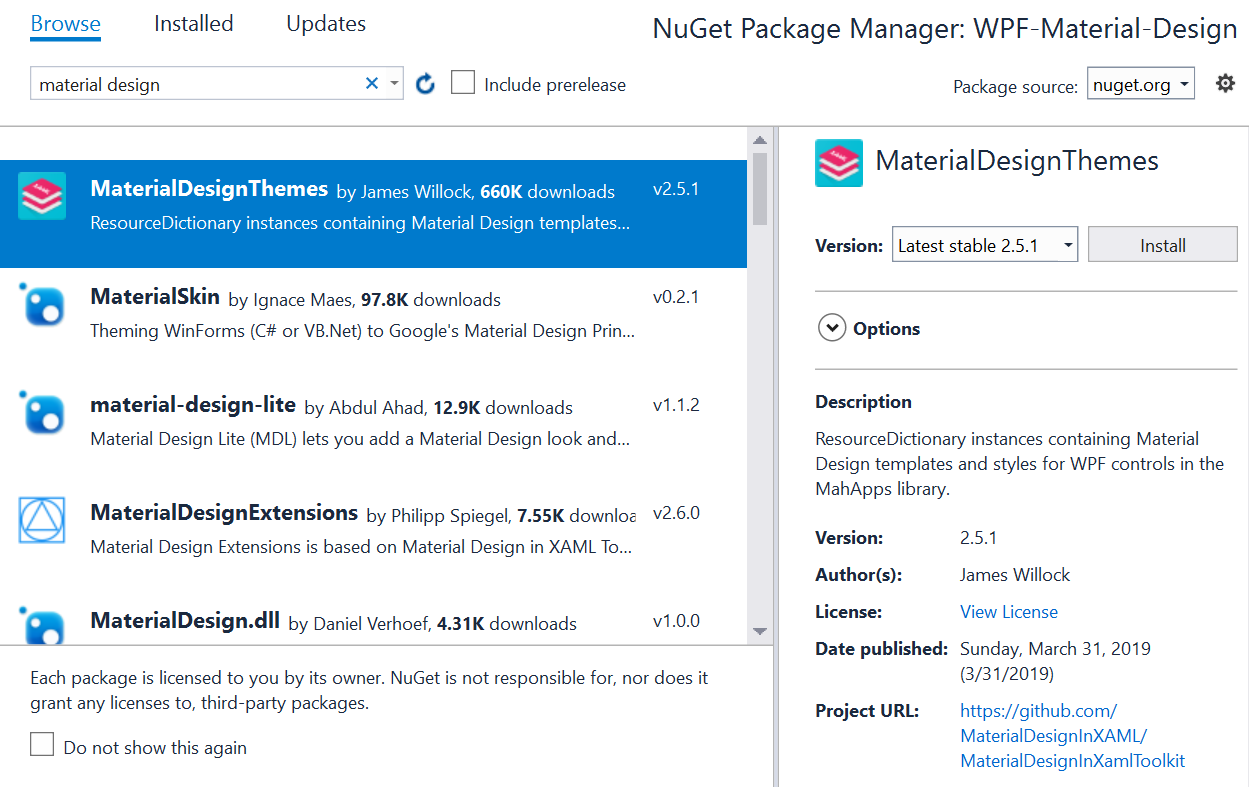
Open the Package Manager and Search "MaterialDesign Themes" and install the package.

Step-3 Open the "App.xaml" and add the "MaterialDesign" resource file as below.
<ResourceDictionary>
            <ResourceDictionary.MergedDictionaries>
                <ResourceDictionary Source="pack://application:,,,/MaterialDesignThemes.Wpf;component/Themes/MaterialDesignTheme.Light.xaml" />
                <ResourceDictionary Source="pack://application:,,,/MaterialDesignThemes.Wpf;component/Themes/MaterialDesignTheme.Defaults.xaml" />
                <ResourceDictionary Source="pack://application:,,,/MaterialDesignColors;component/Themes/Recommended/Primary/MaterialDesignColor.Blue.xaml" />
                <ResourceDictionary Source="pack://application:,,,/MaterialDesignColors;component/Themes/Recommended/Accent/MaterialDesignColor.Purple.xaml" />
            </ResourceDictionary.MergedDictionaries>
        </ResourceDictionary>
xmlns:materialDesign="http://materialdesigninxaml.net/winfx/xaml/themes"
 <materialDesign:Card
    Width="400" Height="340"
  Padding="19" Margin="0 20 0 0">
            <StackPanel>
                <TextBlock
      Margin="16 16 12 8"
      FontSize="16">
    Add Employee Information
                </TextBlock>
                  <Separator
      Style="{StaticResource MaterialDesignLightSeparator}" Background="LightGray" />
                <StackPanel Margin="0 20 0 0">
                    <TextBox
  materialDesign:HintAssist.Hint="Name"
  Style="{StaticResource MaterialDesignFloatingHintTextBox}" />
                    <ComboBox
  materialDesign:HintAssist.Hint="Designation"
  IsEditable="True" Margin="0 20 0 0"
  Style="{StaticResource MaterialDesignFloatingHintComboBox}">
                        <ComboBoxItem
    IsSelected="True">
                            Software Engineer
                        </ComboBoxItem>
                        <ComboBoxItem>
                            HR
                        </ComboBoxItem>
                        <ComboBoxItem>
                            Finance
                        </ComboBoxItem>
                        <ComboBoxItem>
                            Accountant
                        </ComboBoxItem>
                    </ComboBox>
                    <TextBox
  materialDesign:HintAssist.Hint="Phone" Margin="0 15 0 0"
  Style="{StaticResource MaterialDesignFloatingHintTextBox}" />
                    <Separator
      Style="{StaticResource MaterialDesignLightSeparator}" />
                    <materialDesign:DialogHost CloseOnClickAway="True">
                        <materialDesign:DialogHost.DialogContent>
                            <Grid Margin="20">
                                <TextBlock Text="The Information to be Saved" />
                            </Grid>
                        </materialDesign:DialogHost.DialogContent>

                        <Button Command="{x:Static materialDesign:DialogHost.OpenDialogCommand}" Content="Save Information"
               HorizontalAlignment="Left" VerticalAlignment="Center" Margin="50,0,0,0"/>
                    </materialDesign:DialogHost>
                </StackPanel>
            </StackPanel>
        </materialDesign:Card>
 |
| We take Material Design Card and added the respective controls, |
- We take "MaterialDesign Card" with example of adding Employee Info.
- Textbox is consider for Name and Phone , ComboBox item is designation.
- Button is taken and when Click on the button then Confirmation message will show.
- For confirmation box we will take "materialDesign:DialogHost"
</> Find Source Code in Github.com/CoreProgramm/Summary


Post a Comment